
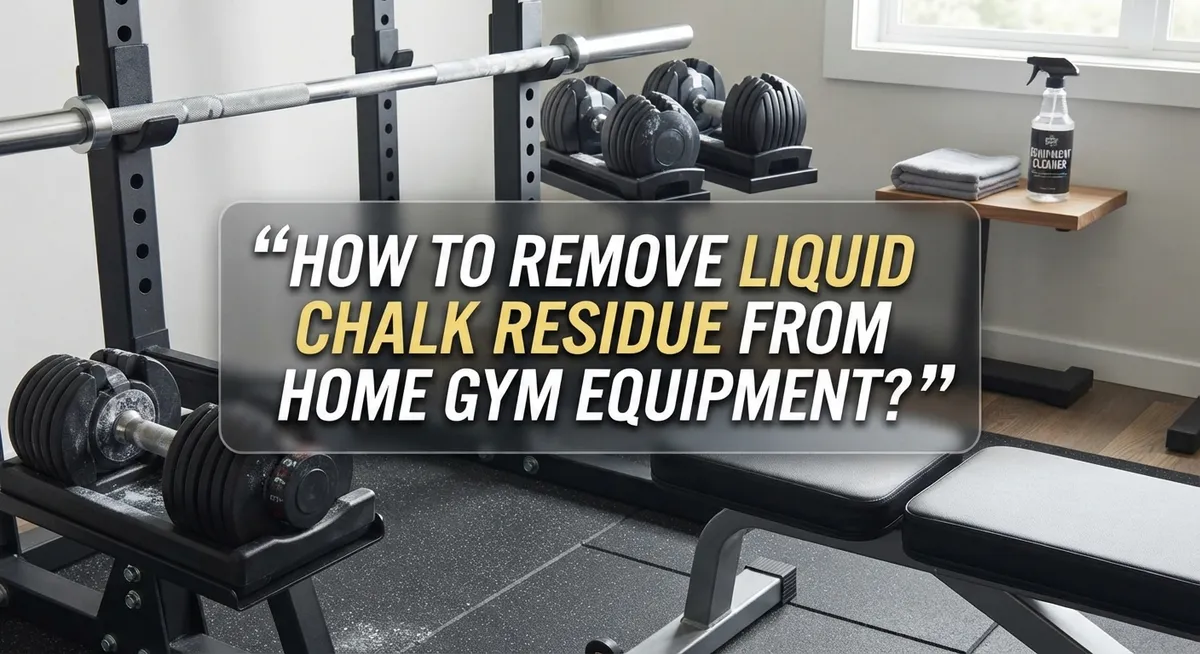
How to Remove Liquid Chalk Residue From Home Gym Equipment?
Liquid chalk keeps your hands dry and your grip strong. But it leaves a chalky mess on your barbells, racks, and floors.
If you skip cleaning, that residue hardens fast. It builds up on every surface you touch during your workout.
The good news? You don’t need harsh chemicals or expensive tools. A simple, consistent cleaning routine keeps your home gym looking fresh.
This guide walks you through easy steps to remove liquid chalk residue. You’ll learn how to wipe down equipment right after use. We’ll also cover the best tools for tackling stubborn buildup on bars, shelves, and weights.
Timing matters more than you think. Cleaning immediately stops chalk from hardening into a tough layer. Wait too long, and you’ll need extra scrubbing power to get surfaces clean again.
We’ll also point out common mistakes people make. Some cleaners actually damage equipment instead of helping it.
By the end of this article, you’ll know exactly how to protect your gear. Your equipment will last longer, and your space will stay clean and safe for every workout.
In a Nutshell
Here’s the quick rundown for keeping your equipment chalk free:
-
Act fast. Wipe down bars, racks, and weights with a damp cloth right after your workout. This stops chalk from hardening into a stubborn layer.
-
Use soft brushes. They lift chalk, dirt, and sweat buildup without scratching surfaces. Keep one near your equipment for quick access.
-
Choose mild solutions. Gym-grade wipes or a light soap and water mix work best on weights and barbells. Skip vinegar, glass cleaner, and acetone. They simply don’t cut through chalk well.
-
Mop floors weekly. Use diluted soap and water, then dry the area completely. Standing water can damage subfloors over time.
-
Avoid harsh chemicals. Strong products can make rubber brittle or cause colors to fade. Gentle cleaning protects your gear long term.
-
Clean shared spaces too. If others use your equipment, wiping it down is good etiquette. It keeps everything sanitary and residue free.
Small habits like these make a big difference. Your equipment stays in top shape, and cleanup never feels like a chore.
Why Liquid Chalk Leaves Residue on Equipment
Liquid chalk leaves residue because of how it works on your skin. The product contains a powder base mixed with alcohol or water. When you apply it to your hands, the liquid evaporates quickly. This leaves behind a fine powder coating that sticks to your palms and fingers.
Once you grip your barbell or dumbbell, that powder transfers directly onto the metal surface. The chalk particles settle into tiny grooves and imperfections on your equipment. Over time, layers build up and create a visible white or gray film.
The residue hardens when exposed to sweat and moisture. Your hands release sweat during workouts. This sweat mixes with the chalk powder on your equipment. The combination creates a paste like substance that bonds to metal and rubber surfaces. If you wait too long to clean, this mixture dries and becomes much tougher to remove.
Temperature and humidity also play a role in residue buildup. Warmer, more humid environments cause chalk to set faster on your gear. This is why prompt cleaning becomes so important in these conditions.
Chalk residue isn’t just a cosmetic problem. Left uncleaned, it can damage your equipment over time. The powder traps moisture against metal surfaces, which promotes rust and corrosion. On rubber flooring, accumulated chalk creates a slippery hazard. It also makes gripping bars more difficult during future workouts since the chalk layer reduces direct contact between your hands and the equipment.
Understanding why this residue forms helps you appreciate why immediate action matters. The sooner you wipe down your gear after training, the easier removal becomes.
Tools and Supplies You’ll Need for Cleaning
You don’t need fancy or expensive items to remove liquid chalk residue. Most supplies sit in your home already.
Start with damp cloths or microfiber towels. These are your first line of defense. Keep them near your equipment so you can wipe down bars and weights immediately after use. Damp cloths lift chalk without scratching metal or rubber surfaces.
Soft brushes work wonderfully for stubborn buildup. Look for brushes with gentle bristles. They remove chalk, dirt, and sweat without damaging your equipment. Avoid stiff wire brushes, which can scratch and gouge surfaces.
A bucket of mild soap and water handles most cleaning jobs. Mix warm water with a small amount of dish soap. This solution works on weights, barbells, racks, and shelves. The soap cuts through residue while staying gentle on finishes.
Spray bottles let you apply your cleaning solution evenly. Fill one with your diluted soap mixture and keep it handy. This prevents you from using too much water, which can seep into joints and cause rust.
Dry towels are essential. After wiping with your damp cloth, dry the equipment completely. This step prevents water damage and keeps your gear looking new.
For floors, a regular mop handles weekly cleaning. Use your diluted soap solution, then dry thoroughly. Wet floors become slippery and can damage subflooring underneath your gym space.
You may already own all these supplies. If not, they cost very little and last for months. The key is keeping everything accessible so cleaning becomes part of your routine, not an afterthought.
Step-by-Step Guide to Removing Liquid Chalk Residue
Start your cleaning routine immediately after you finish your workout. The sooner you act, the easier removal becomes. Chalk residue hardens quickly when it mixes with sweat and moisture, so don’t wait.
Grab a damp cloth and wipe down all equipment surfaces where chalk landed. Focus on barbells, dumbbells, racks, and any other gear you touched. Use gentle circular motions to lift the residue away. A microfiber cloth works especially well because it traps particles without leaving lint behind.
For stubborn buildup, use a soft brush to gently scrub the affected areas. Bristles should be soft enough to avoid scratching metal or rubber surfaces. Work in small sections and wipe away loosened chalk with your damp cloth as you go.
Pay attention to crevices and grooves where chalk tends to settle. These spots collect more residue over time. A soft brush helps you reach into tight spaces that a cloth alone cannot clean.
After wiping individual equipment pieces, address your gym floor. Sweep up any loose chalk powder first. Then mop the area with a diluted soap and water solution. Avoid using excessive water, which can seep into flooring and cause damage underneath.
Dry everything thoroughly when you finish. Use dry towels on equipment and let floors air dry or wipe them with a clean, dry mop. Moisture left behind can promote rust on metal equipment or create slippery surfaces.
Make this routine part of your post-workout habits. Spending five to ten minutes cleaning prevents chalk from building into thick, difficult layers. Your equipment stays in better condition, and your gym space remains clean for everyone who uses it.
Cleaning Barbells, Weights, and Metal Surfaces
Liquid chalk residue on barbells and weights requires a straightforward approach. Start cleaning immediately after your workout because dried residue becomes much harder to remove later.
Grab a damp cloth and wipe down all metal surfaces where chalk accumulated. Use gentle, circular motions to lift the powder away from the barbell shaft and weight plates. Pay special attention to knurled grip areas where chalk tends to embed itself deeply.
For stubborn buildup, a soft brush works better than cloth alone. Gently brush the affected spots using light pressure. This removes chalk particles without scratching or damaging the metal finish. Work the brush into textured areas where powder hides.
After brushing, follow up with your damp cloth to remove loosened particles. This two step process handles most residue effectively.
For weight plates and dumbbells, the same method applies. Wipe each plate individually, especially the sides and edges where chalk settles. Don’t forget the handle areas that contact your hands during lifts.
Never use excess water on metal equipment. Too much moisture promotes rust and corrosion over time. Your cloth should be damp, not dripping wet. Wring it out thoroughly before wiping.
Once you finish cleaning metal pieces, dry everything with a clean towel. This prevents water spots and keeps equipment in top condition.
Store your cleaned equipment in a dry area. Moisture in your gym space can cause rust even after cleaning.
Make this routine automatic after every session. Spending two minutes on immediate cleanup saves you hours of scrubbing later. Consistent maintenance keeps your barbells and weights looking new and functioning properly for years.
Maintaining Racks, Shelves, and Flooring
Racks, shelves, and flooring collect chalk residue faster than individual equipment pieces. These surfaces need consistent attention to stay clean and functional.
Start with your racks and shelves immediately after your workout. Wipe down all horizontal and vertical surfaces with a damp cloth. Pay special attention to corners where chalk settles. Use a soft brush for areas with stubborn buildup or accumulated dust mixed with chalk.
For shelving units, remove items before cleaning. This gives you full access to every surface. Wipe each shelf thoroughly, then dry it completely. Wet shelves can cause rust on metal racks or water damage to wooden ones.
Your gym floor needs weekly attention to prevent chalk from embedding into the surface. Sweep or vacuum first to remove loose particles. Then mop with a diluted soap and water solution. Avoid using excess water, which can seep into subfloors and cause damage.
Pay close attention to areas under your racks and near your lifting platform. Chalk accumulates heavily in these spots. Mop these zones more frequently than other areas.
Dry your floors thoroughly after mopping. Wet floors create slip hazards and promote moisture buildup underneath. Open windows or use fans to speed up drying time.
Consistency matters more than intensity. Quick weekly cleanings prevent chalk from hardening and becoming difficult to remove. A 10 minute cleaning session each week keeps everything in good condition.
Store your mop and cleaning supplies nearby. Easy access encourages regular maintenance. When cleaning supplies are convenient, you’re more likely to stick with your routine.
Setting Up a Regular Cleaning Routine
A regular cleaning routine keeps your home gym fresh and your equipment in top condition. The key is consistency rather than occasional deep cleaning sessions.
Start by cleaning immediately after each workout. Chalk residue hardens over time, making removal much harder later. Wipe down barbells, dumbbells, and racks with a damp cloth right away. This single habit prevents 80 percent of buildup problems.
Set a weekly schedule for your entire gym space. Pick one day each week to mop your floors and do a thorough wipe down of all surfaces. This prevents chalk from embedding into flooring and keeps your equipment looking new.
Make cleaning part of your post-workout routine. Just like you shower after exercise, clean your equipment before you leave the gym area. Spend five minutes wiping everything down. This beats spending thirty minutes scrubbing stubborn residue later.
Keep your cleaning supplies in one convenient spot. Store your damp cloths, soft brushes, and towels nearby so you never skip this step. When supplies are easy to access, you’ll actually use them.
Check your racks and shelves every few days. These areas collect chalk faster than other equipment because they’re near where you lift. A quick wipe keeps them clear.
Dry everything thoroughly after cleaning. Moisture left on metal equipment can cause rust and damage. Use clean towels to remove all water before storing items away.
Consistency matters more than intensity. Quick five minute cleanings prevent problems better than occasional aggressive scrubbing. Your equipment stays protected, your floor stays clean, and your gym remains a pleasant space to train in.
Common Mistakes That Make Residue Worse
Delaying cleanup is the biggest mistake you can make. When you wait hours or days before cleaning, liquid chalk hardens and bonds to your equipment. This makes removal much harder and sometimes requires aggressive scrubbing that damages surfaces.
Using too much water causes serious problems. Excess moisture seeps into metal joints and can rust your barbells and dumbbells. Water also penetrates wooden platforms and can warp or rot them over time. Even worse, water on gym floors creates slippery hazards and damages subflooring underneath.
Harsh chemicals are another common error. Many people reach for vinegar, glass cleaners, or acetone thinking stronger solutions work better. These actually don’t remove liquid chalk effectively and can strip protective coatings from your equipment. They may also discolor metal or leave residue that attracts more dust.
Not cleaning shared equipment shows poor gym etiquette. If multiple people use your home gym, leaving chalk residue on bars or dumbbells forces others to clean up after you. This creates tension and spreads chalk around more than it removes.
Skipping the drying step leads to long term damage. After wiping with a damp cloth, many people forget to dry everything completely. This leaves moisture sitting on metal and wood, which causes rust and deterioration.
The key mistake is inconsistency. People often do one deep clean and then ignore maintenance for weeks. This causes chalk to accumulate and harden, making future cleaning much harder.
Start cleaning immediately after your workout ends. Use minimal water on a damp cloth, not soaking wet. Dry everything thoroughly with a towel. This simple approach prevents 90 percent of residue problems before they start.
Troubleshooting Stubborn or Hardened Residue
When liquid chalk hardens on your equipment, you need a different approach than regular maintenance cleaning. Hardened residue requires more patience and the right technique to avoid damaging your gear.
Start by assessing how thick the buildup is. Light hardening responds well to a damp cloth and gentle rubbing. Press the cloth firmly against the residue and let moisture sit for 30 seconds. This softens the chalk and makes it easier to wipe away.
For moderate buildup, use a soft brush with slightly damp bristles. Work in circular motions across the affected area. The brush breaks up hardened particles without scratching metal or rubber surfaces. Pay attention to grooves and textured areas where chalk collects most.
Stubborn patches need extended moisture contact. Dampen your cloth and hold it against the residue for 2 to 3 minutes. The water gradually penetrates the hardened chalk layer. Once softened, gently scrape with a soft brush or cloth. Repeat this process if needed rather than applying force immediately.
Never use abrasive scrubbers or metal brushes on hardened residue. These tools scratch protective coatings and damage equipment finishes. Avoid vinegar, glass cleaner, or acetone as these don’t effectively dissolve liquid chalk and may harm your gear.
After removing hardened residue, wipe the area with a dry cloth. This prevents moisture from sitting on metal and causing rust or corrosion.
The key lesson is prevention. Hardened residue forms when you skip cleaning sessions. Addressing chalk immediately after workouts keeps it in its softest state. This makes removal faster and protects your equipment from long term damage. Consistency in your cleaning routine prevents hardened buildup from forming in the first place.
Final Thoughts
Cleaning liquid chalk residue does not need to be hard. With the right habits, you keep your equipment looking new and working well.
The secret is simple. Wipe your gear right after you use it. This one step stops most residue problems before they start.
A damp cloth handles fresh chalk easily. You do not need harsh chemicals or expensive tools. Soft brushes and mild soap solutions work just fine for tougher spots.
Remember that water is your friend, but only in small amounts. Too much moisture can damage padding, wood, and metal surfaces. Always dry equipment after you clean it.
Avoid vinegar, glass cleaner, and acetone. These products often fail to remove chalk and can harm your equipment finish. Stick to gentle, proven methods instead.
Consistency beats perfection every time. A quick wipe after each session matters more than one deep clean each month. Small efforts add up over time.
If you share your gym space with others, clean up after yourself. This keeps the area pleasant and shows respect for shared equipment.
When residue does harden, patience helps. Damp cloths held against tough spots for a few minutes will loosen buildup without scratching surfaces.
Your home gym reflects the care you put into it. Clean equipment lasts longer and performs better during every workout.
Make chalk cleanup part of your routine, not an afterthought. Set reminders if you need to build the habit. Keep supplies close so cleaning feels easy, not like a chore.
With these simple practices, liquid chalk residue becomes a minor issue. You spend less time cleaning and more time reaching your fitness goals.
Frequently Asked Questions
Will liquid chalk damage my equipment if I don’t clean it right away?
Yes, delaying cleanup causes problems. Fresh chalk wipes away easily with a damp cloth. When you wait, the residue hardens and becomes much harder to remove. Hardened chalk can also scratch your bars and plates if you try scrubbing it aggressively. Clean immediately after your workout to prevent this issue.
What’s the safest way to clean weighted equipment?
Use a damp cloth and wipe gently across all surfaces. Soft brushes work well for removing chalk buildup from textured areas. Never use harsh chemicals, vinegar, or glass cleaner on your weights. These products don’t work effectively and can damage the finish.
For barbells and racks, wipe them down after each session. A gym-grade wipe or mild soap solution handles most residue. Always dry everything thoroughly afterward to prevent rust and floor damage.
Can I use water to clean liquid chalk residue?
Water is helpful, but use it sparingly. A damp cloth removes fresh chalk perfectly. However, excess water causes real problems. Too much moisture can seep into equipment joints, damage your subfloor, and cause rust on metal parts.
The key is balance. Dampen your cloth lightly, not soaking wet. Wipe the equipment, then dry it immediately with a separate cloth.
Why shouldn’t I skip cleaning shared equipment?
If others use your home gym, leaving chalk residue is poor etiquette. Your gym mates will appreciate walking up to clean equipment. Skipped cleanings also lead to buildup that becomes harder to remove later. Everyone benefits when you clean up after yourself.

Virat is the founder and lead writer at ActivePlayFinds.com, where he shares honest, in-depth reviews, comparisons, and buying guides to help athletes and sports enthusiasts find the perfect gear. With a deep passion for sports and hands-on experience testing a wide range of products, he is committed to helping readers make smart, confident buying decisions.


